Exercise 2 - Animation of Diffusion Wave Model
By Jesper Ellerbæk Nielsen
In this exercise you will deal with a topic you probably are more familiar with than radar data. You will create animations of line graphics presenting the results of a 1 dimensional diffusion wave model.
Contents
Introduction
For this exercise a Matlab script is available for download here. The script models the hydrodynamics of a stream affected by a combined sewer overflow (CSO). The channel is 10 km, 2 meter wide and has a rectangular cross section. However, you are able to change this, if you like. The model parameters are defined in the initialization part of the script. Notice that this type of model gets numerical unstable quite easy. Therefore, not all combinations of the parameters can be modeled – decreasing the time step or increasing the box sizes may make the model stable again.
The diffusion wave model is not as accurate and complicated as the full dynamic wave model. If you want to know more about the diffusion wave model, students before you have spend some time of their 9th semester project on this type of model. Their project was published on a webpage and is available here. Due to insufficient html coding skills by the otherwise very bright students, the webpage is only working properly in Internet Explorer. You will find the wave model under ‘Vandløbsmodellering’ and ‘Strømningsmodel’. Please note that the indexation of the model boxes is running upstream in the description whereas, the indexation runs downstream in the available script. Despite small differences the model concept is the same. The model is a box model and the hydrodynamics is modeled by solving the continuity equation combined with the impulse equation numerically. The upstream boundary is a flow boundary and the downstream boundary is a water depth boundary – simulating that the water runs into the sea or e.g. the Limfjord which will not be affected significantly by the wave in the stream.
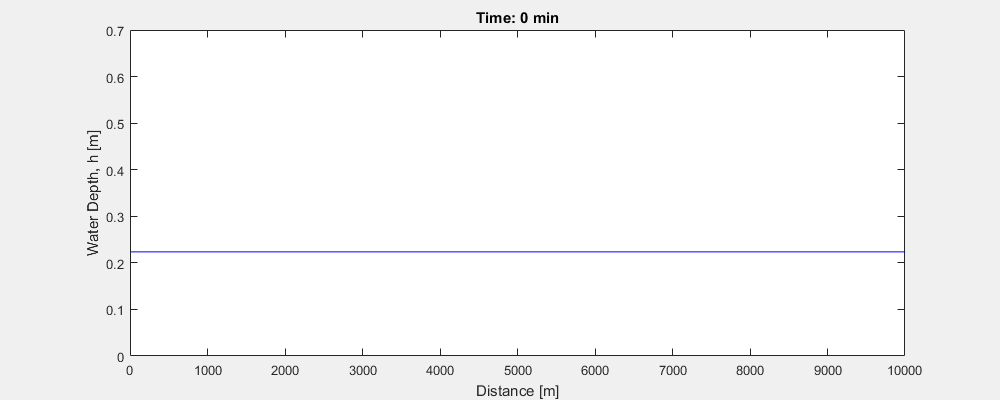
Download the script to the folder you would like to work in – open the script, hit F5 and see what you get. If an animation appears like this one everything is working correct.
Spend some time reviewing the code and get a feeling of what is going on. You might want to try to change some of the model parameters – Try if you can get the model to crash and maybe make it stable again :).
The animation is showing the temporal variations of the water depth in the channel – meaning the distance from the bottom of the channel to the water surface. Moreover, the wave top is tracked and marked.
The movie player in Matlab
Matlab has a build-in movie palyer. You will not be using the function directly in the exercises however, it is a function you may find useful.
In the radar data exercise you used the 'getframe' function to capture a frame from a figure for your animation. In the radar exercise the frame was written to a GIF-file and replaced by the following frame in the loop. However, you have also the possibility to save all the frames in the memory or in a '.mat' file. The movie player can then be used to view the frames again.
The following peace of Matlab code is an example illustrating this concept. Consult the documentation for more information on the 'getframe' and 'implay' function.
Fig=figure('position',[200 200 300 300]);
x=linspace(0,8*pi,300);
for i=1:100
     y=(x).*cos(x+0.1*pi*i);
     plot(x,y);
     axis([0 25 -25 25]);
     pause(0.01);
     frames(i)=getframe(Fig);
 end
save('movieframes.mat','frames');
close(Fig);
Now the frames are saved in the ‘movieframes.mat’ file. The file can easily be reloaded into your workspace by the 'load' function and played in the movie player with 'implay' command:
load('movieframes.mat')
implay(frames);

Copy the piece of code into Matlab and get some experience with the movie player.
Part 1 - Make an avi movie
Matlab contains a 'VideoWriter' function to create e.g. .avi movies. The function can also write mp4 movies if desired. The procedure for writing frames to your movie is fairly simple. However, the 'writer' needs to be used with the Matlabs 'open' and 'close' methods. See the documentation for the 'VideoWriter' and 'writeVideo' functions. First a 'writer object' needs to be created. Once done, the properties of the object can be set e.g. the framerate (Frames pr. sec.). When the properties are set, you open the object using the 'open' command and write the frames by the means of the 'writeVideo' function. When you are done writing the frames to the movie close the object using the 'close' command. The following code illustrates the procedure:
MovieObj=VideoWriter('AviExample.avi'); % Create the movie object
MovieObj.FrameRate=60; % Set the properties if desired (in this case the frame rate)
open(MovieObj) % Get the movie object ready for writing

Fig=figure('position',[200 200 300 300]);
x=linspace(0,8*pi,300);
for i=1:200
    y=(x).*cos(x+0.1*pi*i);
    plot(x,y);
    axis([0 25 -25 25]);
    pause(0.01);
    frame=getframe(Fig); % Grab the frame
    writeVideo(MovieObj,frame); % Write the frame to the object
end
close(MovieObj);
close(Fig);
The example results in this avi.
Task
Edit the diffusion wave script and make an avi-file of the animation.
Part 2 - Visualize the diffusion of the wave
The axes were stationary in the animation of part 1, but it does not have to be so!
Task
Make an animation that follows the wave. By doing so, you will be able to follow the diffusion of the wave. Save the animation either as a avi-movie or as GIF-file - you decide.
Your animation should end up looking something like this:

Hint: The colored area illustrating the water can be achived by the 'area' plot function.
Part 3 - Make your own animation of wave the model
Task
You have the wave model. You got the ability to make and save animations. Use your imagination and creativity to make your own animation of the wave model. The Q matrix contains the flow if you want to alter it.
If you are completely out of ideas you are welcome to try to make an animation similar to this one:
